Studio Tree
Drag
and drop to move items in the tree
See also: Introduction to using the Studio, Introduction to Designing Forms
Introduction
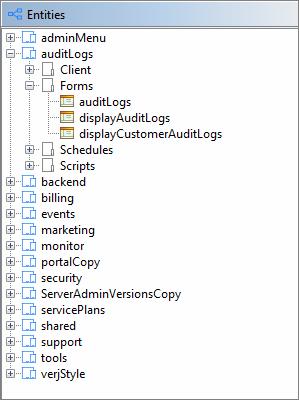
The studio tree is initially displayed on the left-hand side of the studio window, but it can be dragged to other locations if required. The tree shows all projects, folders, entities and other files that exist in the workspace. Double-click on an item in the tree to open it.
The project is
the most important organisational element within the workspace; projects are
shown with the ![]() icon. In general you can create any
project/folder structure that you want within the workspace, but there are a
couple of restrictions:
icon. In general you can create any
project/folder structure that you want within the workspace, but there are a
couple of restrictions:
- A project is the only element that can be created at the top level of the workspace.
- All other elements – folders, entities etc can only be created within a project
When you create a new project, you can optionally select a pre-configured project folder structure or base the folder structure on an existing project. If you always want to create empty projects then check the Always create empty project option on the General Tab of Designer Preferences.
All entities within a project are automatically available to all other entities in the same project. Note that it’s also possible to link projects together using Project Properties; this makes all the entities in the second project available to the first project. Click here for more information on projects and relationships within entities.
Tree right-click menu
Right-click at any point within the tree shows a menu with the following options, though some options may be greyed out depending on which items are selected:
|
|
New |
Create a new project, folder or entity. A project will always be created at the top level of the workspace. Anything else will be created at the selected location. This same functionality is available by clicking File > New from the menu at the top of the studio. Click here for a summary of the different entities that you can create. |
|
|
Open |
Opens the entity in the corresponding editor. When opening Web Resource files, file types can be associated with editors in the Web Content tab of designer preferences. If there is no editor associated with the file being opened, the system will attempt to open it using the default Text Editor. If the entity contains any broken references, the Uses Panel is displayed automatically and will show the broken relationships in a Missing Entities section at the bottom of the panel. |
|
|
Test (Ctrl R) |
Tests (runs) the selected entity if it can be run. When the entity is a form that has URL parameters configured, or if option Display options panel when launching forms is selected in the General tab of designer preferences, the run form dialog is displayed. This dialog supports: · Setting values for parameters (form fields configured as URL parameters) · Selecting language · Selecting browser |
|
|
Cut |
Cuts selected items. This is treated as a delete followed by copy. |
|
|
Copy |
Copies selected items to the clipboard. Entities are not refactored when they are copied/pasted to different tree locations, they are simply copied without change; this can result in invalid references in the pasted entity. This is in contrast to moving entities using drag and drop where references are automatically refactored. |
|
|
Paste |
Paste items from the clipboard. Copied/pasted entities are not refactored. |
|
|
Rename (F2) |
Renames the selected item. If this change means that references to this element from other entities need to be adjusted, you will be warned before these entities are refactored. Click here for more details. |
|
|
Delete |
Deletes the selected item(s). You will be warned if any of the items to be deleted are in use i.e. they are referred to by other entities within the workspace. Click here for more details. |
|
|
Properties |
This is only available when a project is selected and shows the Project Properties Panel where you can configure which additional projects should be linked to the selected project. |
|
|
Use Project Theme |
This is a convenient way to set the Theme without opening and individually editing each Form and Component. Changes all the Forms and Components contained within the selected entities to use the Projects Theme. This action is only applicable if the following entities are selected: · Projects · Folders · Forms · Components. This operation cannot be undone. |
|
|
Import |
Import entities from the file system or from an archive file. Click here for more details. |
|
|
Export |
Export selected entities to an archive file. Click here for more details. |
|
|
Deploy |
Deploy selected entities to the selected
target server. A list of potential target servers is shown in a dropdown with
cloud servers shown with a |
|
|
Run on Server |
Runs the selected entity on a target server. A list of
potential target servers is shown in a dropdown with cloud servers shown with
a |
|
|
Deploy and Run |
Deploys the selected entity and any other entities which
it needs to run e.g. linked scripts, to the selected target server then runs
the selected entity. A list of potential target servers is shown in a
dropdown with cloud servers shown with a |
|
|
References |
Shows the References Panel containing all references to the selected entity. You can double click on leaf items (lowest level items) within this panel to open each referencing entity at the closest point to where the reference is made. |
|
|
Uses |
Shows the Uses Panel containing
all entities used by this entity. This is the reverse of clicking on References. |
|
|
Refresh |
Refreshes the tree structure from the file system. The entire tree can be refreshed by selecting View > Refresh tree from the menu at the top of the studio window. |
Drag and drop to move items in the tree
Items and folders can be relocated in the tree by dragging them to the new location; a black arrow is shown when the mouse is over a valid drop location. All references to the relocated items are automatically refactored. If items are dragged to a different project the new project may be linked with existing projects if this is necessary to ensure that all moved entities are still accessible. Click here for more info on how relationships work.
Tree
toolbar
|
|
Toggle auto-hide |
When a panel is auto-hidden, the panel content is not shown and its title tab is displayed on the edge of the docking manager area. Clicking once on the auto-hidden panel tab restores the panel to its previous location. |